
Create a function app
You must have a function app to host the execution of your functions. A function app lets you group functions as a logical unit for easier management, deployment, scaling, and sharing of resources.
From the Azure portal menu or the Home page, select Create a resource.
In the New page, select Compute > Function App.
On the Basics page, use the function app settings as specified in the following table:
Setting Suggested value Description Subscription Your subscription The subscription under which you'll create your new function app. Resource Group myResourceGroup Name for the new resource group in which you'll create your function app. You should create a new resource group because there are known limitations when creating new function apps in an existing resource group. Function App name Globally unique name Name that identifies your new function app. Valid characters are a-z(case insensitive),0-9, and-.Publish Code Option to publish code files or a Docker container. Runtime stack Preferred language Choose a runtime that supports your favorite function programming language. In-portal editing is only available for JavaScript, PowerShell, TypeScript, and C# script. C# class library, Java, and Python functions must be developed locally. Version Version number Choose the version of your installed runtime. Region Preferred region Select a region that's near you or near other services that your functions can access. Select Next : Hosting. On the Hosting page, enter the following settings:
Setting Suggested value Description Storage account Globally unique name Create a storage account used by your function app. Storage account names must be between 3 and 24 characters in length and can contain numbers and lowercase letters only. You can also use an existing account, which must meet the storage account requirements. Operating system Windows An operating system is pre-selected for you based on your runtime stack selection, but you can change the setting if necessary. In-portal editing is only supported on Windows. Plan Consumption (Serverless) Hosting plan that defines how resources are allocated to your function app. In the default Consumption plan, resources are added dynamically as required by your functions. In this serverless hosting, you pay only for the time your functions run. When you run in an App Service plan, you must manage the scaling of your function app. Select Next : Monitoring. On the Monitoring page, enter the following settings:
Setting Suggested value Description Application Insights Default Creates an Application Insights resource of the same App name in the nearest supported region. By expanding this setting or selecting Create new, you can change the Application Insights name or select a different region in an Azure geography where you want to store your data. Select Review + create to review the app configuration selections.
On the Review + create page, review your settings, and then select Create to provision and deploy the function app.
Next, create a function in the new function app.
Create an HTTP trigger function
From the left menu of the Function App window, select Functions, and then select Create from the top menu.
From the Create Function window, leave the Development environment property as Develop in portal, and then select the HTTP trigger template.
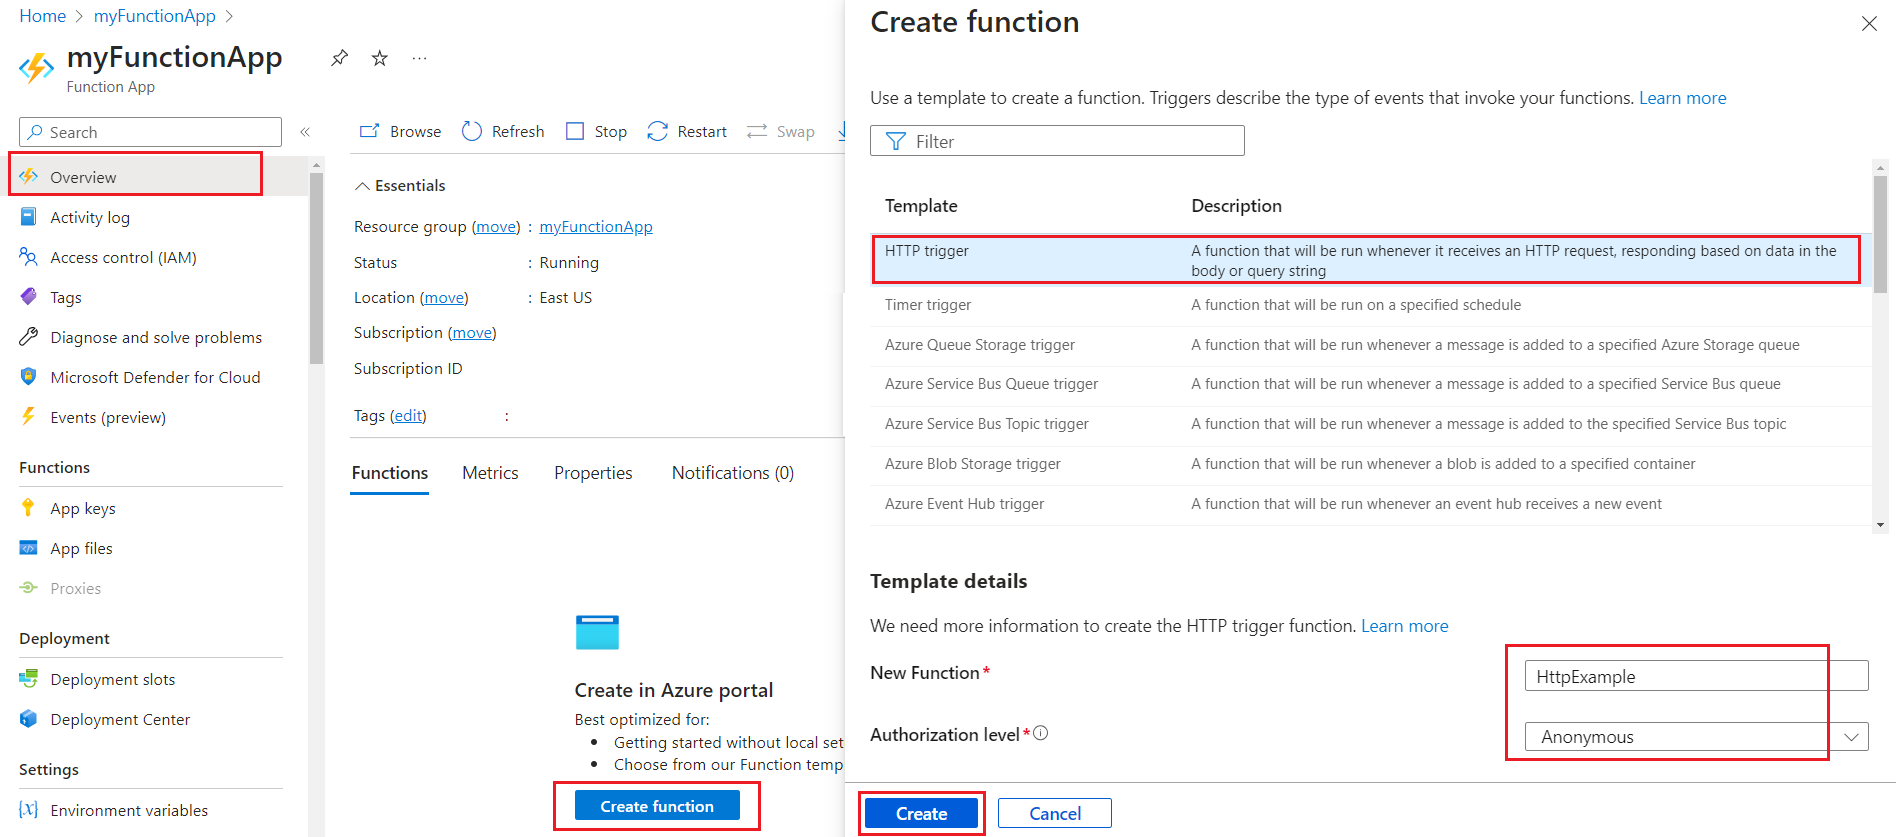
Under Template details use
HttpExamplefor New Function, select Anonymous from the Authorization level drop-down list, and then select Create.Azure creates the HTTP trigger function. Now, you can run the new function by sending an HTTP request.
Test the function
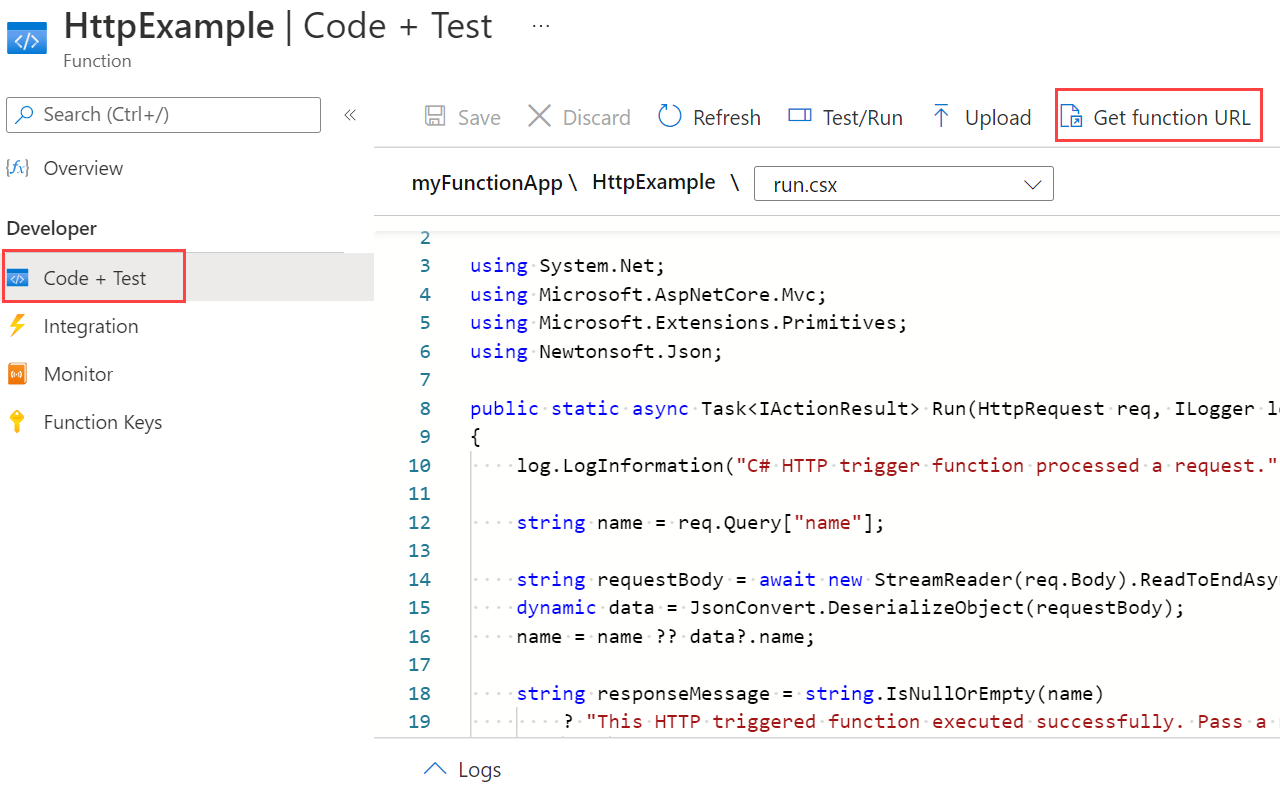
In your new HTTP trigger function, select Code + Test from the left menu, and then select Get function URL from the top menu.
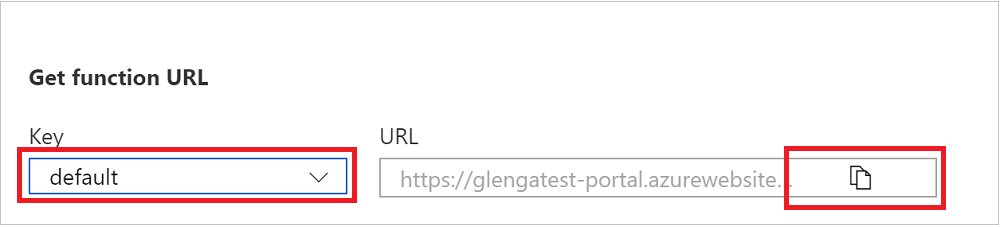
In the Get function URL dialog, select default from the drop-down list, and then select the Copy to clipboard icon.
Paste the function URL into your browser's address bar. Add the query string value
?name=<your_name>to the end of this URL and press Enter to run the request. The browser must display a response message that echoes back your query string value.If the request URL included an access key (
?code=...), it means you selected Function instead of Anonymous access level when creating the function. In this case, you must instead append&name=<your_name>.When your function runs, trace information is written to the logs. To see the trace output, return to the Code + Test page in the portal and expand the Logs arrow at the bottom of the page. Call your function again to see the trace output written to the logs.


0 Comments