
How To Create Azure Web App in Azure Portal
To create Azure Web App, you will be required with a subscription plan so ensure that you have the required subscription.
STEP 1) Log in to Azure Portal.
STEP 2) Go to an Azure Portal, and log in to your account. The Home page will appear with the option of ‘Create a Resource‘. Click on it to proceed further.

Alternatively, you can create a resource from the hamburger icon on the left top corner of the home page.
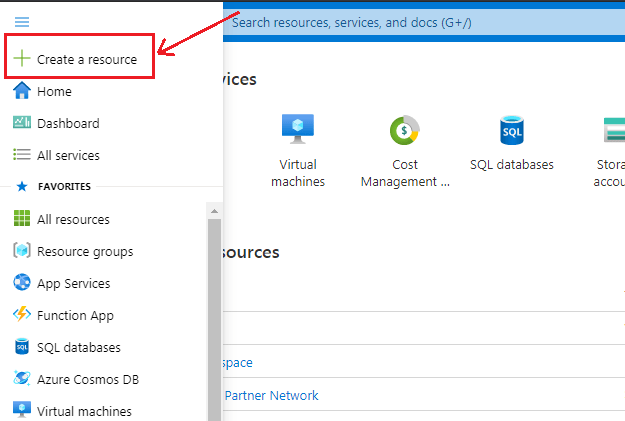
STEP 3) Under ‘Create a Resource’, you will see various categories; select the Web App option and refer to the image below.

Step 4) The following screen will appear with the heading ‘Create Web App‘, now add the following details:
- Subscription – It specifies the valid subscription plan for the Azure Portal.
- Resource Group – you can create a new resource group here; it will specify (New) in front of the resource group name.
- Name – Specify the name you want to keep for your Web App Instance.
- Publish – It will provide you with two options: Code and the Docker Container.
- Runtime Stack – It specifies the technology through which you deploy the app. We have selected .NET 6 (LTS) .
- Operating System – It helps in selecting the hosting platform for the application. Windows and Linux are two options.
- Region – Select the region.
- SKU and Size – It will specify how many apps you can create under this subscription. By default, it shows Standard S1.
After filling in all the mentioned detail, Click on ‘Create‘. This section would look similar to the below image.

STEP 5) As soon as we click on Create button, the deployment process gets initiated. The following screen appears when the deployment process gets completed; then click on ‘Go to Resource‘.

STEP 6) When we go to the resource we created, we will see that the Web App is created. Refer to the below image to understand better.

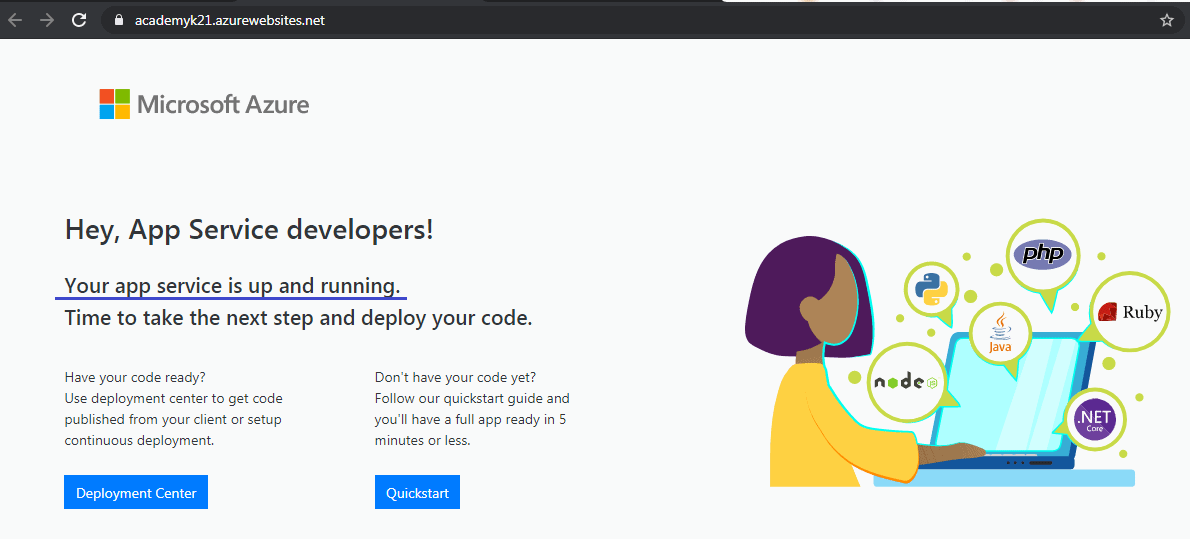
STEP 7) After that, click on the web app created by you as underlined in the below image, there you will find a Url; click to reach the next screen.

STEP 8) When you click on Url, it will take you to the next screen indicating the created web app. As we haven’t deployed any code, it asks to deploy the code.
Conclusion
Hence Azure Web App is a powerful tool for developers wishing to easily build and deploy web applications, and its features and tools make it a vital platform for anybody trying to develop web applications in the cloud.


0 Comments